You’ve nailed an incredible photoshoot for your brand—congratulations! The lighting was perfect, the products looked stunning, and everything felt just right on the day of the shoot. But now, as you sit down for edits, distractions in the background catch your eye. Maybe it’s an awkward shadow, an unexpected prop, or just a cluttered scene. Frustrating, right? Especially when editing isn’t your strong suit, and reshooting everything is out of the question—it’s simply too time-consuming and expensive.
Don’t worry; there’s a smarter solution. Enter the Background Makeover technique. With the right tools and tips, you can remove distractions, create clean, professional-looking visuals, and make your products truly stand out—all without needing to be a seasoned editor or starting over from scratch. Let’s dive into how you can transform your images with ease and efficiency!
Back to Basics- Why Should You Remove Image Backgrounds?
Background removal isn’t about whitewashing your image; rather, it entails enhancing the subject by eliminating unnecessary distractions. Are you wondering when and why should you remove the image backgrounds? Let’s look at three major reasons why.
1. Improve Product Photos
The importance of a great product picture is huge for online sales. Visuals are crucial for effective marketing materials. When you use the background remover tool, you can highlight your product by eliminating distractions from the white background. This keeps the attention on your item, making it more appealing and boosting sales potential.
2. Graphic Design
A clean image with no background offers limitless possibilities in graphic design. With new backgrounds, you can seamlessly integrate your subject image into various designs, making it versatile for multiple uses, be it in posters or digital media inputs. More so, using raw images with backgrounds may lead to inconsistencies in design, disrupting the visual harmony.
3. Easy Image Editing
Background removal is your shortcut to easy image editing with design tools. While traditional editing can be time-consuming and might require substantial skills, online background remover tools simplify the process. With a single click, you obtain an enhanced image ready for use or further customization, significantly hastening your workflow and efficiency.
Also read our blog on some of the best photography shots that help your brand storytelling better.
How Do I Remove The Background Of An Image With Tools?
Once you’ve decided to eliminate the background from an image, the next step is selecting the method that best suits you. Various methods can be used for different levels of complexity and requirements, ranging from manual techniques to professional software and online tools. Let’s explore each of them in detail:
1. Manual Techniques
Manual techniques of background removal necessitate a certain level of acquaintance with photo editing. These methods give you complete control over the background removal process but might require some time and effort. The precision and results achieved, however, compensate for the invested time, especially if the image requires detailed editing. Here’s how you can do it differently:
- Paper Cutout Effect: Use the freehand Lasso Tool or Pen Tool in free software like GIMP. Trace the edges of your subject to separate it from the background manually. This method ensures precision for intricate details but requires patience.
- Zoom & Erase: Utilize Zoom features and basic Eraser tools in any standard editing software to carefully eliminate unwanted background areas.
- Layer Blending: Create multiple layers to refine your edits step by step. Manually blending layers allows you to handle areas like hair or uneven edges with greater care.
- Basic Shapes & Gradients: For simple product shots or logos, you can overlay shapes or gradient-filled backgrounds to replace the original.
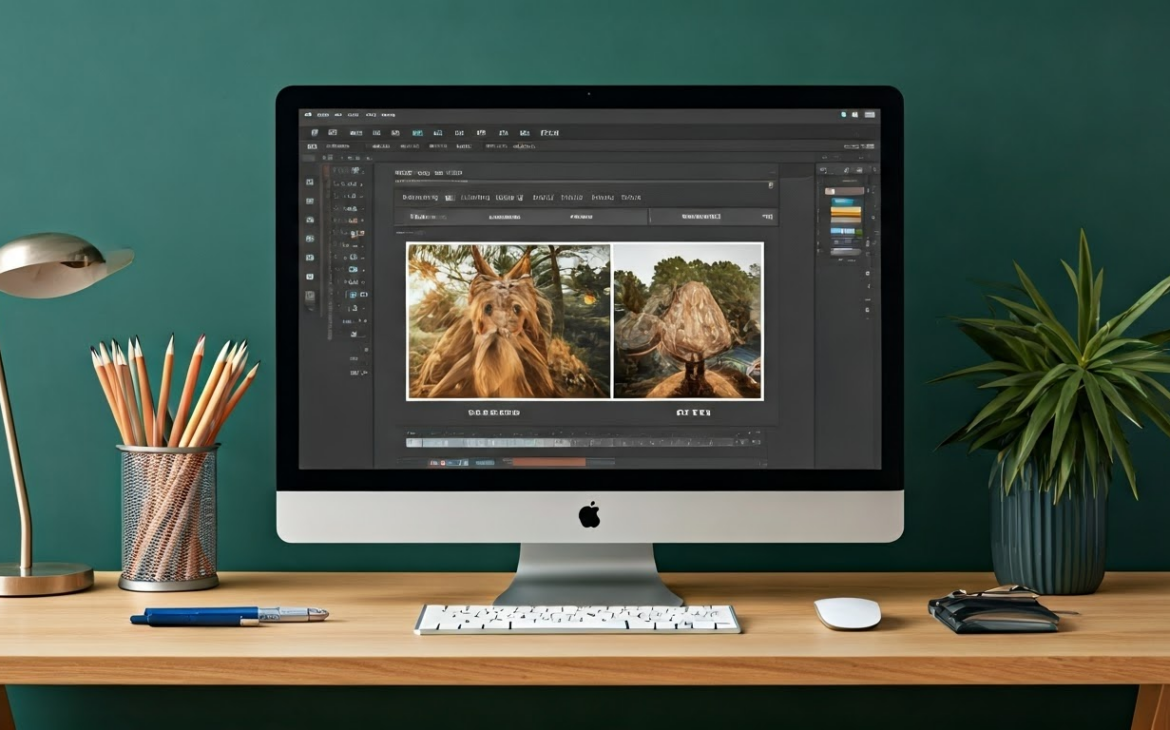
2. Using Professional Software
In contrast, professional software like Photoshop and Illustrator provides automatic AI background remover features that simplify this task. Here are a few professional tools for background removal:
- Photoshop: Adobe Photoshop is a popular choice for background removal due to its advanced tools and capabilities. With features like the Magic Wand tool, Quick Selection tool, and Refine Edge Brush, users can efficiently remove backgrounds with precision and ease. Additionally, Photoshop offers options for manual adjustments and fine-tuning to achieve the desired result.
- Illustrator: Adobe Illustrator is another powerful tool for background removal, especially when working with vector graphics. Its tools like the Clipping Mask and Pathfinder make it easy to isolate objects from their backgrounds and create clean, professional-looking images. An advanced tool offering an exhaustive set of editing features.
- Canva: Canva offers a user-friendly online platform with simpler tools for background removal. It caters to users with basic editing needs, providing templates and easy-to-use features to remove backgrounds swiftly. Canva is ideal for quick edits and projects that do not require intricate detailing, making it a convenient option for beginners or those seeking a hassle-free process. A beginner-friendly platform with a one-click background removal option.
- Remove.bg: Among many other online tools, Remove.bg is a convenient tool designed specifically for quick background removal. It uses AI technology to automatically detect and remove backgrounds from images, saving users time and effort.
While it may not offer the same level of customization as professional software like Photoshop or Illustrator, Remove.bg is perfect for simple edits and projects that require swift results.
Before reading on further, you can quickly brush up your knowledge on everything you need to know about ecommerce photography and how to ace it better for your brand.
How To Take The Background Out Of A Picture in 4 Easy Steps?
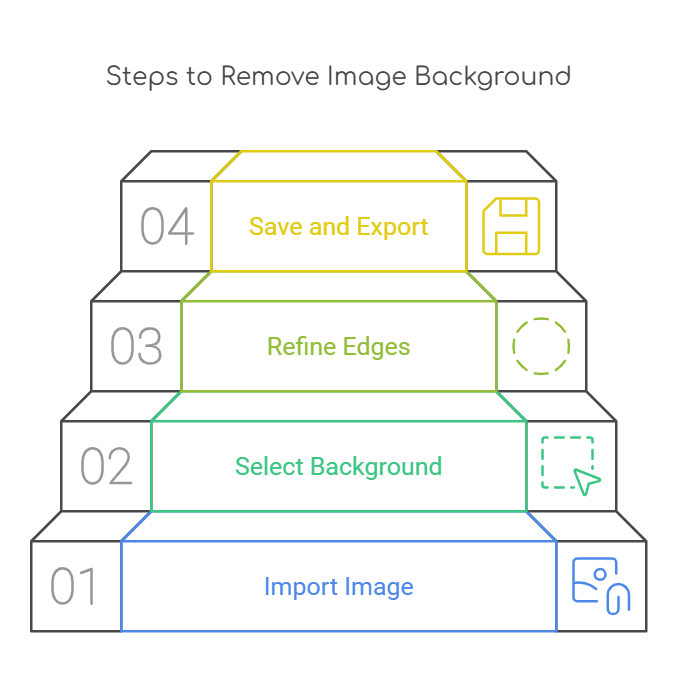
Now that you have an understanding of the various methods and have a suitable tool at hand, let’s remove that background! Here is a simple step-by-step guide on how to remove backgrounds from your product images, irrespective of the method or tool you choose.
1. Import the Image
The journey starts by uploading your image in your editing app or software. Ensure that the image quality is good, and the subject is distinguishable from the background for accurate removal.
2. Select the Background Area
Use the selection tools in the software to identify the area you want to remove. Some tools offer automatic selection based on color differences between the subject and the background.
3. Refine the Edges
After the initial selection, refine the edges using brush tools or automatic features. This step is crucial in ensuring a clean and natural-looking cut-out of your subject.
4. Save and Export as a Transparent File
After removing the background, save the file in a format that maintains transparency, typically a PNG file. Now your new product image without the background is ready to be used anywhere!
How Do I Remove The Background Of An Image on iPhone?
Often, we need to quickly remove backgrounds from images right on our phones. Luckily, if you’re an iPhone user, there are multiple ways to do this without needing a computer or complicated software. Let’s explore how you can change the background color or remove it altogether using different iPhone apps.
Removing the Background from a Picture on iPhone Using the Photos App
Step 1: Open the Photos app on your iPhone.
Step 2: Select the image you want to edit.
Step 3: Tap Edit, then use the Markup option.
Step 4: Use the drawing and eraser tools to manually remove the background in the desired area.
Removing the Background from a Picture on iPhone Using the Files App
Step 1: Open the Files app and locate your image.
Step 2: Press and hold the image, then choose Quick Actions from the menu.
Step 3: Tap on Remove Background.
Step 4: The new version of your image with a transparent background will be saved in your Files.
Removing the Background from a Picture on iPhone Using Safari
Step 1: Open Safari and visit an online background removal tool, such as Remove.bg.
Step 2: Upload your image to the tool.
Step 3: Wait for the tool to process the image and remove the background.
Step 4: Download the new image with the background removed.
If these tricks don’t work for you, consider checking out Apple’s guide here.
How To Take Your Background Removal Up A Notch In 3 Steps? Tips for a Cleaner Removal
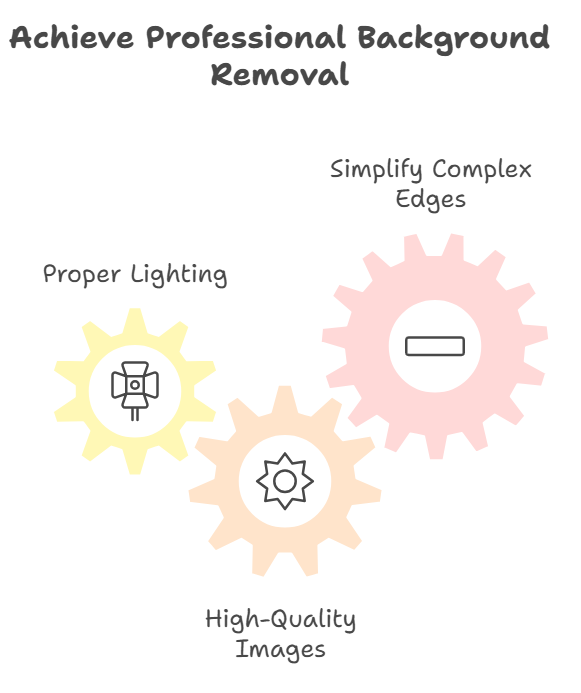
Achieving a seamless and neatly done background removal requires a bit of practice and a few handy tips. Let’s learn about these helpful tips that can guide you to get a professional-level finish on your images every time.
1. Proper Lighting
Light is the key to distinguishing your subject from the background clearly. Poor lighting may lead to merged shadows and colors, making background removal difficult. Thus, ensure that your subject is well-lit and stands out from its background.
2. High-Quality Images
High-resolution images offer better details and a clear distinction between the subject and the background. Therefore, always shoot or choose high-quality pictures for editing. This results in precise cut-outs and smooth edges after background removal.
3. Simplify Complex Edges
In the case of intricate subjects with complex edges, consider simplifying them by covering those areas with non-contrasting colors. This can make the removal process uncomplicated and reduce refining efforts post-removal.
Why It Is Best To Partner With An Expert Solution For Your Business’s Photoshoot Needs?
Removing the background from an image can instantly enhance its visual appeal, making the subject pop with clarity and professionalism. While DIY tools like Photoshop or free online editors can help, achieving seamless results—especially with intricate edges or complex backgrounds—often requires time and expertise. That’s where FlixStudio steps in as a hassle-free, all-in-one solution.
FlixStudio is an AI-powered platform that simplifies the creation of high-quality e-commerce imagery. By implementing advanced technologies like generative AI and 3D modeling, FlixStudio ensures unmatched precision in tasks like background removal and other image refinements.
If you want these solutions for your business, contact us today to find out more on how we can help you better in telling your brand story.
Conclusion
Extraordinary visuals hold the potential to make significant impacts. If you know what it takes to cover the distance from a great picture to an impactful photograph- you open up limitless possibilities to revolutionize our mundane images and set them apart. It not only enhances the visual appeal of product photographs but also improves the effectiveness of graphic designing efforts.
Coupling skills with quick tips like good lighting and quality images make edits look professional. Start exploring background removal to enhance your image storytelling today.
Frequently Asked Questions
How do I remove the background from pictures?
You can utilize various manual techniques, professional software, or online tools to remove backgrounds from pictures. AI-powered online tools are most time-efficient, while software like Photoshop and Illustrator tend to be more precise.
How do I remove the background layer from an image?
Removing the background layer is as simple as importing your image into an editing tool, selecting the background area, refining the edges for precision, and exporting as a transparent PNG file.
How do I remove the background from a photo in my iPhone?
iPhones offer different ways to remove the background from photos using the Photos App, Files App, or even Safari using online tools that work well on browsers.
How to change the background of a picture for free?
Many free online tools like Adobe Express and Remove.bg allow you to remove and change the background of pictures easily and instantly.
What are the benefits of using a transparent background in images?
A transparent background offers versatility to your image, allowing you to highlight the subject of your photo and add any new background later. It makes your subject prominent for product photos and simplifies integration into a variety of new designs for graphic designing.