Today’s consumers increasingly shop for clothes online, and their purchasing decisions are heavily influenced by the images provided by retailers. Over half of shoppers consider brand-provided imagery when deciding whether to purchase a particular piece of clothing. Hence, high-quality clothing photography for e-commerce is not just a luxury; it is an absolute necessity for every online store.
In this blog post, we will delve into different product photography styles, equipment needs, the process of capturing compelling images, and techniques for post-production editing. We will also explore ideas for creative clothing photography and methods for optimizing images for SEO and conversions.
Clothing Photography Styles
There are various approaches to an Ecommerce store clothing photo shoot each designed to cater to the diverse consumer base. Common styles include flat-lay photography, where items are laid flat and captured from above, photographs of clothing on live models or mannequins, and lifestyle shots that place garments in real-life settings. The choice of style can impact the perception of your products and influence buying decisions.
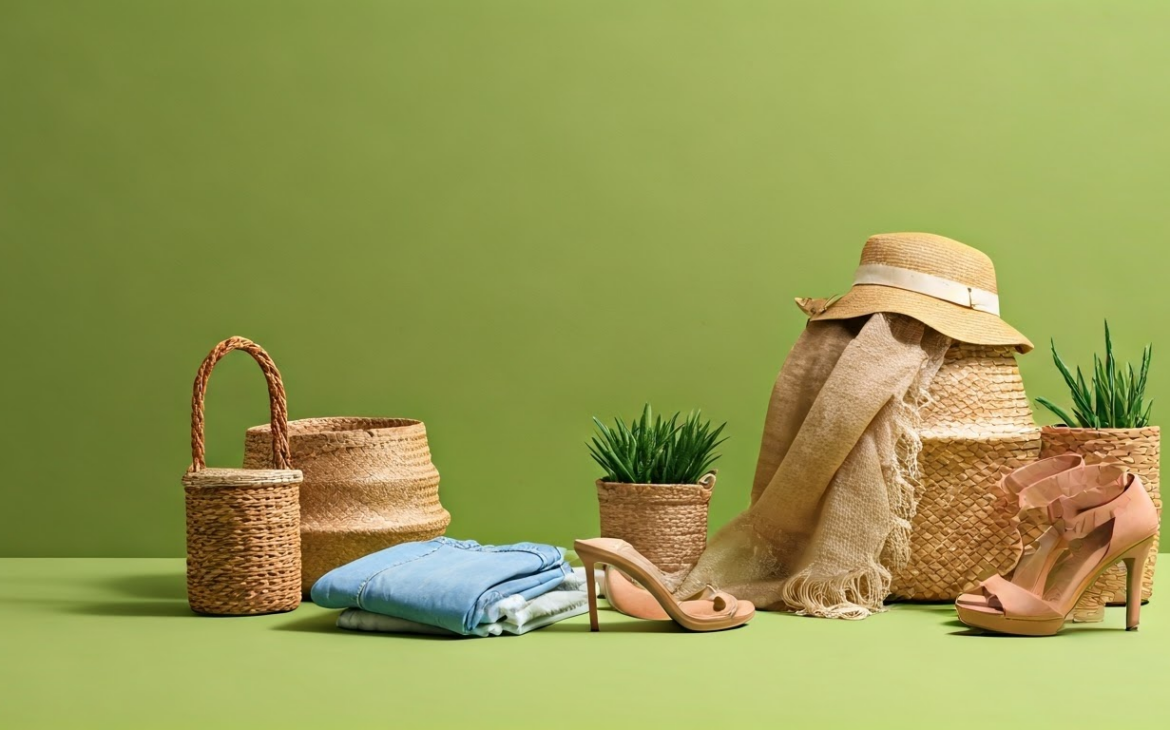
Flat Lay
Flat-lay clothing photography involves presenting your piece of apparel on a flat surface, providing a bird’s eye view of the product. This technique allows you to showcase the colors, textures, and potential styling combinations of your pieces. For example, laying out an entire outfit- pants, a shirt, a hat, some accessories, and a pair of shoes- in one frame can embody a whole look without needing a model or mannequin.
Key points to keep in mind for flat lay photography include:
- Be intentional with a color palette or theme: Coordinating colors or sticking to a particular theme can make your flat lays really pop.
- Placement matters: Pay attention to the placement of each clothing item or accessory. Aim for symmetrical or balanced designs that draw the viewer’s eye across the entire image.
- Use a textured or contrasting background: A textured or contrasting background can add depth to your flat lays and help your clothing items stand out.
- Experiment with different angles and perspectives: Instead of only shooting from directly overhead, try taking photos from different angles or tilts to create a more dynamic image.
- Incorporate props: Props can add an extra element of interest to your flat lays and give customers an idea of how to style your clothing.
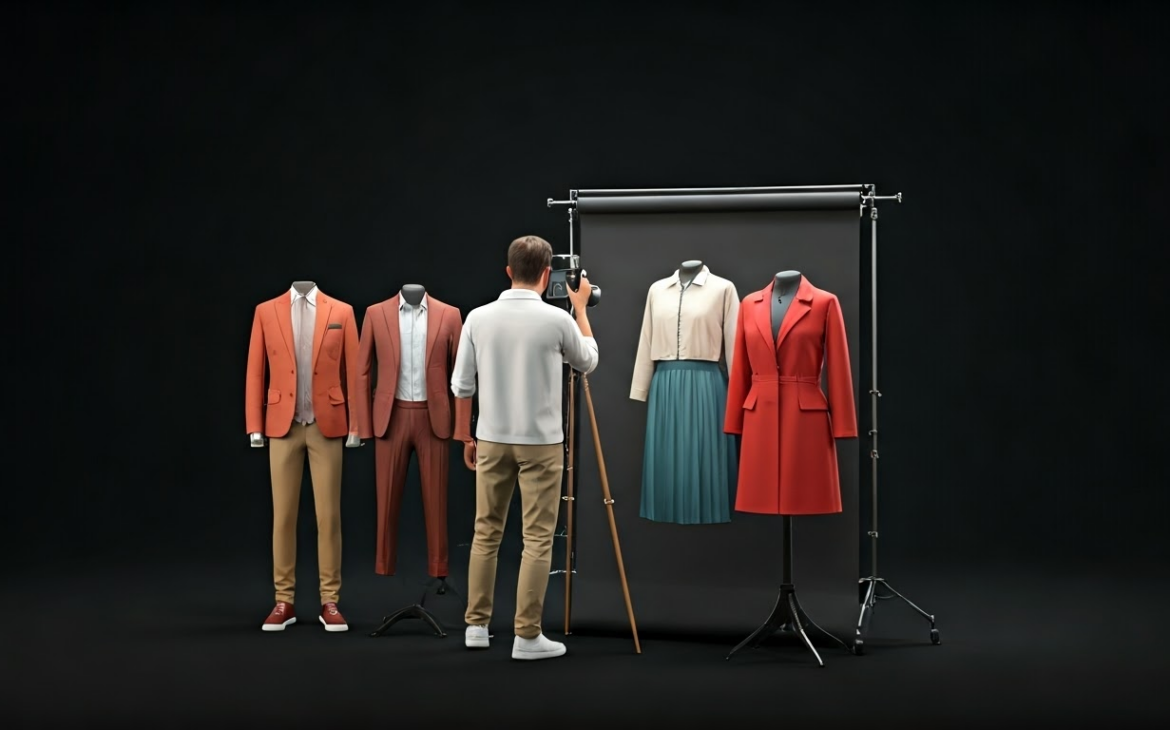
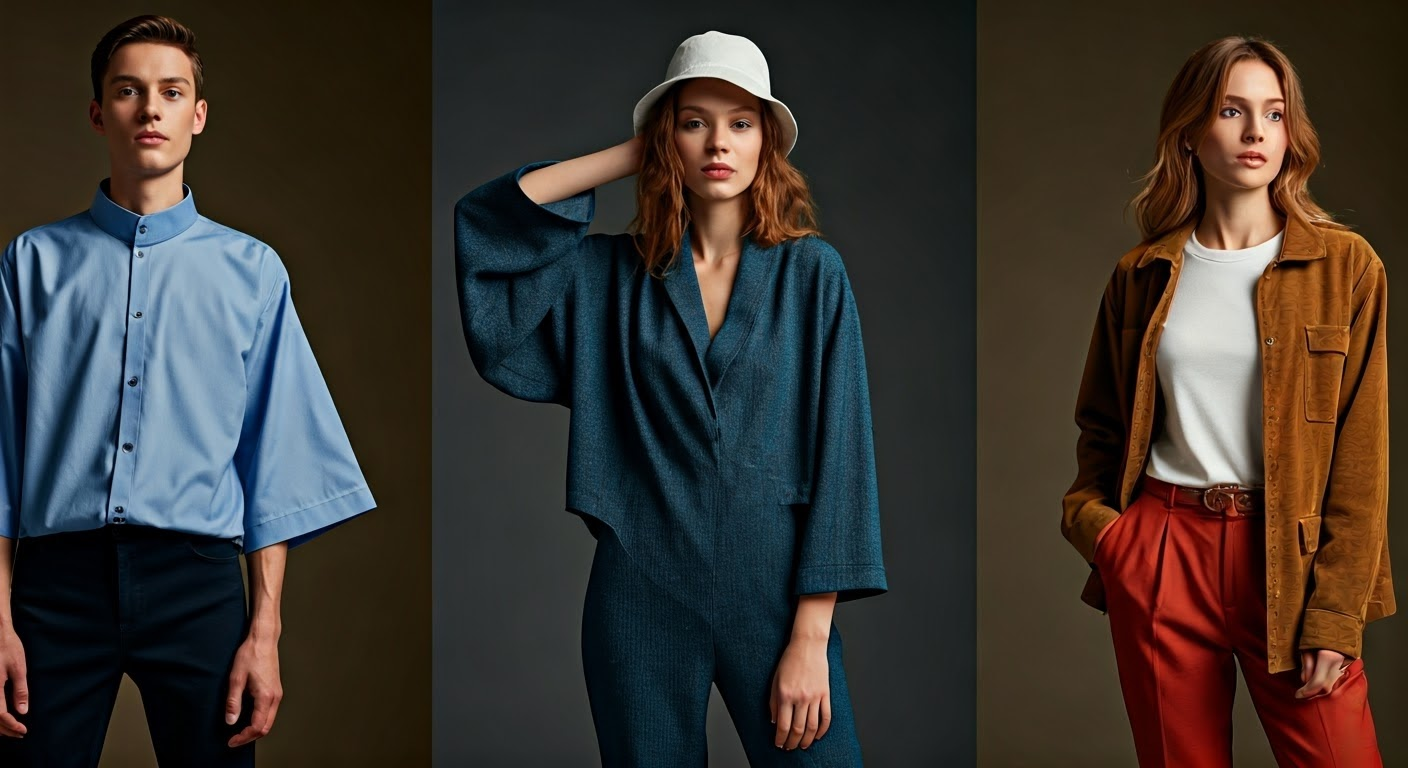
Models and Mannequins
Using live models or mannequins is another popular method used to simulate how an item will fit on a potential customer. Models offer a real-world representation of how your clothing fits on various body types and heights. However, hiring professional models can be costly. Therefore, if your budget is tight, mannequins can serve as an effective alternative. They adequately display how your garments drape and fit, though they lack the expressive quality and versatility that live models bring to the table.
Maximizing the effectiveness of using models and mannequins involves the following aspects:
- Diverse Representation: Try to represent a range of body types and heights to cater to your diverse customer base.
- Clear Visibility: Whether it’s a model or mannequin, ensure that your clothing item is clearly visible and properly fitted.
- Consistency: Aim for consistency in modelling shots, including similar poses, angles, lighting and backgrounds.
- Highlight details: Use close-up shots to highlight specific details of your clothing, such as texture, patterns, or stitching.
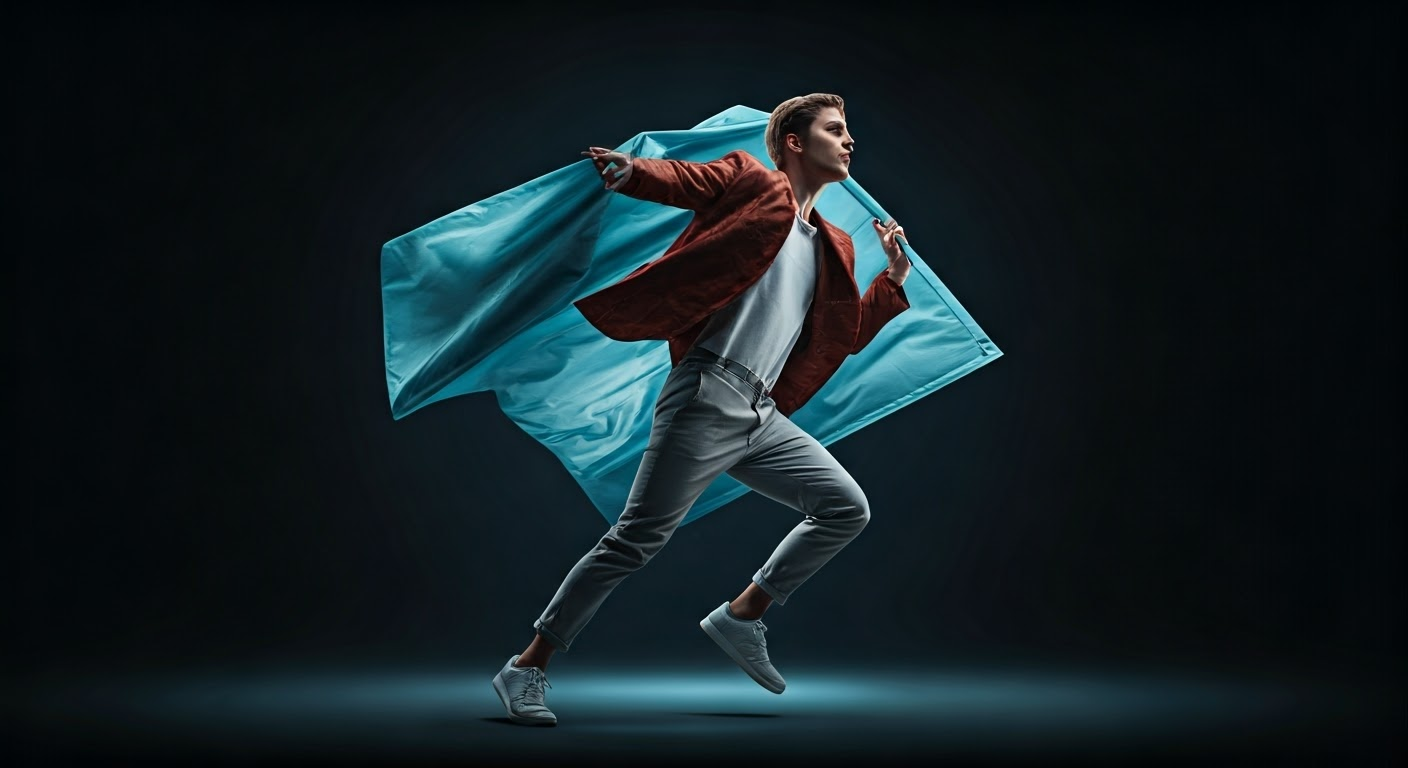
Lifestyle Shots
Lifestyle shots help to put your fashion products into context by portraying them in real-world settings. They often feature models wearing the clothes and interacting with their environment, giving potential customers an idea of how the clothes would fit into their own lives. Lifestyle photography can be shot indoors or outdoors, using natural light to bring a sense of realism and authenticity to the images.
Key techniques to consider include:
- Matching surroundings: Ensure that the setting complements the color palette or style of your clothes.
- Showcase multiple items: Lifestyle shots offer an opportunity to showcase multiple items from your clothing line together, highlighting the versatility and coordination of your products.
- Capturing action: Show models in movement to add dynamism and convey the functionality of your garments.
- Telling a story: Think about the stories you want to tell with your imagery. These could be around particular themes, occasions, or lifestyles that align with your brand identity.
Also Read: Unlocking 9 Latest Fashion Photography Trends in 2024
Equipment and Setup for Clothing Photography
A successful clothing photography session requires the right equipment and setup. Though it isn’t necessary to have a large warehouse for a photo studio, a small room or blank wall within your store or home with sufficient space for positioning the backdrop, camera, lighting, and clothing can serve the purpose efficiently. Key components include a high-quality camera, sturdy tripod, professional lighting equipment, and different backdrops to vary the outlook of your photos.
Camera and Settings
Understanding your camera and its settings is essential for achieving professional-looking images. If you have a newer smartphone, the camera is likely capable of taking great photos with little to no learning curve. However, if you want more professional-looking images, upgrading to a DSLR or mirrorless camera can make a world of difference.
Key considerations for your camera and settings include:
- Camera Type: Using a DSLR or mirrorless camera can provide superior image quality and more control over settings than mobile phones.
- Lens: Prime lenses ranging from 50 millimeters to 200 millimetres offer the best focal length for studio photography.
- Manual Mode: Allows adjustment of aperture, focus, and shutter speed for overall control of your images.
- Aperture-Priority Mode: A semi-automatic setting that lets you set the aperture value while automatically adjusting the shutter speed for accurate exposure.
Lighting Techniques
Artificial lighting is the industry standard for shooting products, as it provides complete control over shadows and highlights, crucial for drawing attention to specific details such as stitching and texture. A common method used is three-point lighting, which comprises a key light, fill light, and backlight.
- Key Light: This is the main light source that shines directly onto the clothing. It’s usually the brightest and defines the object’s most prominent shading and highlighting.
- Fill Light: This light source illuminates the shadows caused by the key light. It’s generally less bright and there to supplement the softer areas of illumination for a more three-dimensional look.
- Backlight: Positioned behind the object, the backlight helps create depth by adding a subtle glow around the edges, separating the subject from the background.
- Studio Lights: Individual studio lights can be used to create your own setup for versatility and preference.
- Light Reflectors/Diffusers: Use these to bounce or scatter light in different directions, eliminating harsh shadows or too bright highlights.
Backgrounds and Props
The choice of background in clothing photography largely contributes to the focus, attention, and overall aesthetic appeal of your product images. White background or light gray backdrops are often used because they help to highlight the colors and textures of the clothing without causing any distraction.
Likewise, props can enhance the look of your images, providing context and visual interest. Consider using props such as hangers, mirrors, plants, or other accessories that complement your clothing line. However, make sure your props don’t pull focus from the main item – your clothing. The right balance of background and props can help in creating engaging and visually appealing product images.
Also read: Capturing the Best Shots: Apparel Product Photography Guide
The Photography Process
A structured and systematic approach to clothing photography can vastly improve the output and efficiency of your photoshoot. From preparation of the clothing items to selecting the right location and posing, every step directly impacts the quality of your images. Post-production editing is also a key phase, polishing the images and ensuring they look professional.
Preparing the Clothing Items
Pay close attention to detail before embarking on a photography session. Clothes should be in excellent, brand-new condition, and free of any wrinkles, lint, or loose stitches that could detract from their appearance in photos. Use an iron or clothing steamer to smooth out wrinkles and a lint roller to remove any dust or fibers.
Aside from making sure each garment is clean and flawlessly presented, it’s also important to carefully select the items you’ll photograph. Aim to showcase a range of styles, colors, and designs that encapsulate the essence of your brand and appeal to your target audience. Organize clothes by category or color to make the styling and shooting process smoother.
Finally, hang the items on a rack away from your working space until you’re ready to photograph them. This not only keeps them in pristine condition but also allows you to easily overview and access the items during the shoot.
Choosing the Right Location
The location for your clothing photography plays a significant role in determining the overall mood and style of your images. Whether it’s a specific room in your home, a professional studio, or an outdoor location, it’s crucial to pick a space that complements your products and aligns with your brand identity.
If you’re shooting indoors, choose a space with plenty of natural light for the best results. However, if you’re shooting outdoors or in a natural setting, consider locations that offer interesting textures and backgrounds that can enhance the aesthetic of your clothing. A lush park, urban street corner, or rustic barn door can provide a unique and captivating backdrop.
Remember that lighting conditions can drastically change the look and feel of your images. Therefore, it’s advisable to conduct the photoshoot during the “golden hours” right after sunrise or before sunset, considering the time of day for soft, warm lighting.
Posing and Styling Tips
Posing and styling play instrumental roles in how your clothing looks in photos. If you’re using models, ensure their poses provide a better understanding of natural and comfortable styles. Dynamic poses can bring energy to your images and show off the versatility and functionality of your clothes. Meanwhile, mannequins should be positioned to highlight the fit and style of the clothing.
Keep the following tips in mind:
- Change Poses: Try different poses and perspectives to provide a well-rounded view of your clothing item.
- Accessorize: Use accessories to enhance the outfit and give customers styling ideas.
- Paint a Picture: Tell a story with your clothing images, whether it’s an aspirational lifestyle or a particular fashion trend.
- Mix It Up: Blend different photography styles throughout your product catalog to cater to varied consumer preferences.
Post-production and Editing Techniques
Post-production is essential in refining your clothing pictures and making them ready for publication. Background removal, color correction, filter application, exposure adjustment, and resizing for various platforms are typical editing tasks.
Software like Adobe Photoshop and Lightroom come in handy for these tasks. However, there are also online photo editing applications like Shopify’s Media Editor that you can utilize. Remember, the goal of editing should not be to alter the look of the clothes but to enhance the overall quality and appeal of the images.
Clothing Photography Ideas
Creative photography techniques can help your apparel stand out and make a lasting impression on potential customers. It involves adopting new perspectives, using props creatively, and showcasing outfit combinations in an appealing way. These ideas can add a dash of panache to your product images, making them more engaging and persuasive.
Creative Angles and Perspectives
Experiment with various angles and perspectives to add depth and character to your clothing photographs. Try capturing images from a lower angle to make items appear larger or more imposing, or take aerial shots for an unconventional perspective. You could also focus on particular product details, such as the stitching or fabric texture, to highlight the quality of your products.
Don’t be afraid to try out unique and out-of-the-box ideas. For instance, taking pictures through different objects such as frames or glass can produce interesting effects. Whether it’s a traditional flat lay, a model in motion, or a piece of clothing against a vibrant backdrop, exploring different styles and concepts can welcome a fresh aesthetic to your clothing photography.
Utilizing Props to Enhance the Scene
Props can breathe life into your clothing photos, adding context and depth while simultaneously showcasing the versatility of your clothing line. For instance, you could drape a delicate shawl over a stool or hang a flowy dress from a rustic ladder to give off a cozy bohemian vibe.
Choose props that are consistent with your brand image and complement your products well. Suppose you’re shooting sportswear, you could include equipment like weights or tennis balls. If it’s a party dress, a champagne flute or sequined purse might set the mood. Keep in mind though, your garment should still be the star of the show. Any prop used should supplement, not divert attention away from the product.
Showcasing Color Variants and Outfit Combinations
Presenting color variants and potential outfit combinations of your apparel is a great way to maximize your clothing photography. This strategy not only visually displays the variety of options available but also inspires customers on how they can mix and match items. Hence, it’s beneficial to:
- Showcase All Color Variants: If you offer a t-shirt or jacket in multiple colors, photograph every variant to give your customers a complete understanding of what each color looks like in real life.
- Display Coordinated Outfits: Combine different items from your range together to create a complete outfit. This helps customers visualize the pairing and might motivate them to buy multiple items.
- Throw In Accessories: Include accessories like scarves, jewelry, or bags to add flair to the outfit. This not only enhances the look but also encourages cross-selling.
- Utilize Models or Mannequins: Showcasing outfit combinations on models or mannequins can provide a realistic idea about how the clothing will fit and work together.
Optimizing Images for SEO and Conversions
Optimizing your clothing images for search engine ranking and conversions is as crucial as the photography itself. It includes careful consideration of file formats, image dimensions, and precisely naming and describing your images. Furthermore, SEO optimization involves using alt tags for images, maintaining a high resolution, using white space, and evaluating page load speed. This can help your online store rank higher on search engines and convert potential customers into actual buyers.
File Format and Image Size
Utilizing the correct file format and image size ensures your clothing images render well on all devices, providing identical shopping experiences for every user. JPEG is the most recommended format for high-quality images offering the smallest size. However, PNG works best for simple images requiring less detail.
Moreover, the preferred image resolution starts from 1024×1024 pixels. This resolution allows for ample detail when a user zooms in but is not excessively heavy to hamper page load speed. As for image dimensions, it’s important to meet platform-specific guidelines like those of Amazon and Shopify for optimal display.
Properly Naming and Describing Your Images
Correctly naming your images and providing precise descriptions can help improve your site’s SEO, making it easier for potential customers to find your products. Instead of using generic file names, include relevant keys like product name, color, or style in the filename. For instance, a file named “red-silk-dress.jpg” is more SEO-friendly than a generic “IMG001.jpg”.
In the same aspect, tagging your images accurately also impacts SEO. Alt tags provide a text description of an image for search engines and aid visually impaired users in understanding your content. An apt alt-tag for a blue denim jacket could be “Blue Denim Jacket with Silver Buttons”.
Crank your clothing photography up a notch with FlixStudio
In the competitive world of e-commerce, high-quality visuals are the key to capturing attention and driving sales. At FlixStudio, we specialize in clothing photography that transforms your products into must-have items. Our expert team combines precision lighting, creative styling, and advanced techniques to showcase every detail, texture, and color with unmatched clarity.
From dynamic lifestyle shots to clean, crisp product images, we tailor our services to align with your brand’s identity and engage your target audience. With FlixStudio, your clothing collection will shine across every platform, enticing customers and building trust through visually stunning imagery. Let us help you turn clicks into conversions with photography that speaks for itself.
Conclusion
Superior quality clothing photography is indispensable for the success of any online fashion business. Understanding different styles, having appropriate equipment, knowing how to set up the right ambiance, and ensuring there is not too much light in the scene, alongside having an effective post-production process, are key to nailing perfect clothing photographs. Creative angles, harnessing the power of props, showcasing color variations, and outfit combinations can all contribute to making your images more compelling.
Furthermore, optimization techniques such as using the right file formats and image sizes, accurately naming and describing your outfits are crucial for SEO and improving conversion rates and conversions. By executing these strategies effectively, you can ensure that your clothing photography stands out, inspires, and persuades customers to hit that ‘buy now’ button.
Frequently Asked Questions
What is the best camera for clothing photography?
The choice of camera largely depends on your budget and the level of professional detail you aspire. While newer smartphones can capture decent photos, DSLRs or mirrorless cameras with a prime lens ranging from 50 to 200 millimeters can deliver superior image quality and versatility.
How much does it cost to photograph clothing for an online store?
Photographing clothing can range widely in costs depending on whether you choose the DIY route or hire a professional photographer. While DIY can range from free to $5,000 depending on existing equipment, hiring a professional can typically cost between $200 and $500 per hour.
What are some common mistakes in clothing photography?
Common mistakes include poor lighting, bland or distracting backgrounds, and lack of creativity. Another significant error is not ironing or overlooking minor imperfections in the clothes before photographing them. Furthermore, failing to optimize and correctly name your images can negatively impact your SEO and conversions.
Can I do the photography myself or should I hire a professional?
While starting with DIY photography is feasible, as your business scales, it’s wise to hire a professional who has years of experience to ensure high-quality, consistent images. Professionals bring expertise, knowledge of current trends, and access to high-end equipment that can make a game-changing difference in your clothing photography.
How can I make my clothing photography stand out from competitors?
Creativity, context, and quality are key for standout clothing photography. Experiment with unique ideas, shoot from different perspectives, use props effectively, and showcase various color variants and styling combinations. Most importantly, remember to optimize your images for SEO and maintain high resolution for enhanced user experience and conversions.